
This tutorial is especially for those who cannot bead but would like to be able to do simple repairs on their own jewellery and for absolute beginners in jewellery making.
 |
| jewellery findings |
The most basic skill you need to learn is how to open a jump ring, wire loop and/or an eye pin properly. You can buy these basic findings in jewellery supply stores, craft shops and online. Once you know how to open and close them professionally you can put this skill to good use for a number of projects including re-attaching clasps etc. If you don't have jewellery pliers, strong tweezers will work for this basic repair job (not for making jewellery though!) You need two pairs- one to hold the finding steady.
I am afraid I only have two hands (please forgive me) thus limiting how much I can photograph to get the points across. A little imagination will be required.
First I will explain the WRONG WAY:
 |
| overstretched wire |
It is tempting, and seems logical to just pull the sides of the ring or loop away from each other laterally. Pulling to the sides will overstretch the wire and damage the integrity of the loop. It is usually very hard to get it back together perfectly flush and tight or in the same shape again. It can ruin an evenly rounded loop in more pliable metals such as sterling silver or thinner gauges of wire.
 |
| jump ring that wont close fully |
Even if you manage to keep it rounded, you will probably find that the edges just don't meet in the same way as before, rendering the loop or ring loose, weak and prone to opening.
 |
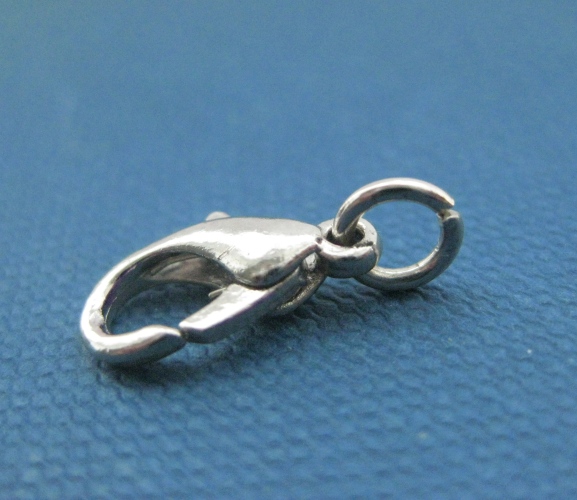
| correctly opened jump ring |
THE CORRECT WAY is quite simple, but maybe not very obvious to the beginner. With a pliers or strong tweezers in each hand, gently pull the two sides of the ring away from each other, one forward (towards you) and the other backwards so it looks something like the photo above.
 |
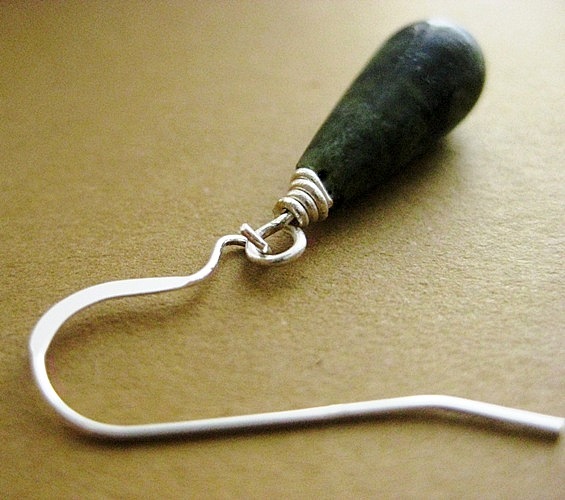
| opening a loop |
In the case of eyepins and loops on earring hooks, just tease the open side forwardly away from the rest of the wire. (Please imagine my hand or a second pliers holding the earring hook in the photo above) No need too over-pull it. Open it just enough to get the link or charm on to it. I've opened the loop a tad further than I need for clarity in the photos.


This does not overstretch the wire so it wont have lost shape or integrity when you later squeeze it back to the original position. (Careful not to pull it too far though.)
 |
 |
| closing the loop |
Close up the loop or jump ring by gently pressing it back down into place and squeezing with the pliers or tweezers. It shouldn't require much effort to get it as tight and perfect as before.
With a little practice you'll find you get a professional, reliable finish quickly and easily! Watch this space for future easy projects where you can put this skill to use.
***
Click here to learn How to Make Jump Rings
Perfect instructions, I can't agree more!
ReplyDeleteThank you! It was very hard to photograph! Hope the photos make sense to those who don't make jewellery!
Delete